API documentationTable Of ContentsPrevious topicNext topicThis Page |
Dynamic pages¶Dynamic pages allow Administrators to chose a layout from 12 pre-defined sets and add content without the need for knowledge of any programming language. 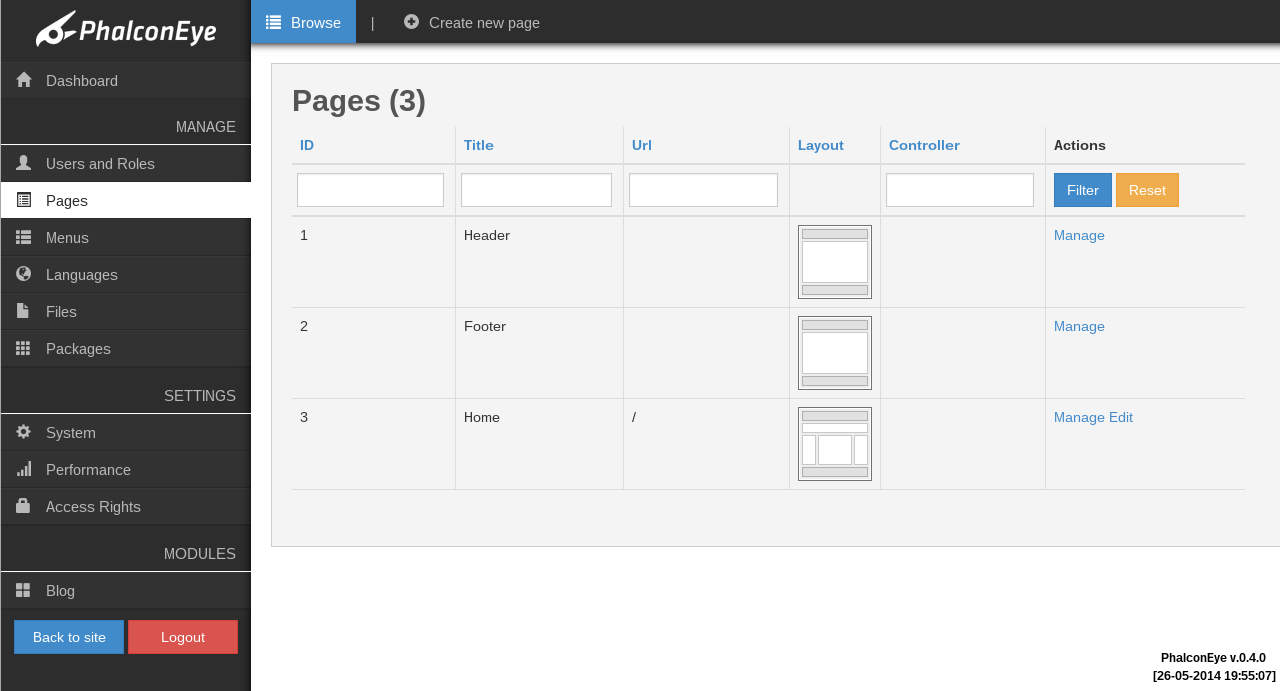
You can see the type of layout for each page in “Layout” column. Adding and editing pages¶To create a new page - navigate to “Create new page”. 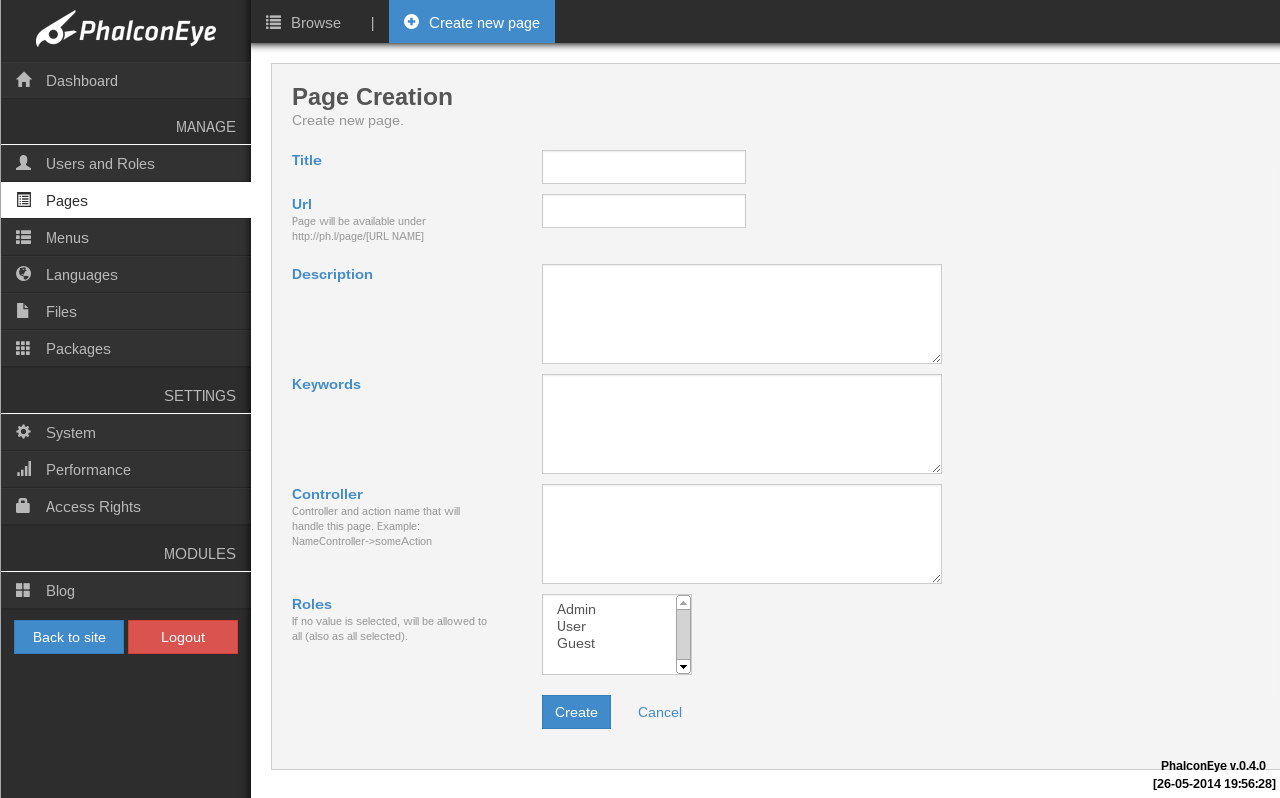
Fields description:
Header and Footer are two specific “Page areas” in the CMS for whose the above settings can not be edited. These as well as the “Home page” are integrated into the CMS and cannot be removed. Page management¶Pages consist of widgets which are the basic build blocks in PhalconEye that perform a specific function such as displaying Menu or Social Icons. You will find widgets in WordPress, Joomla and Drupal call them modules. Widgets can be easily dragged and dropped into a specific widget area within the layout. 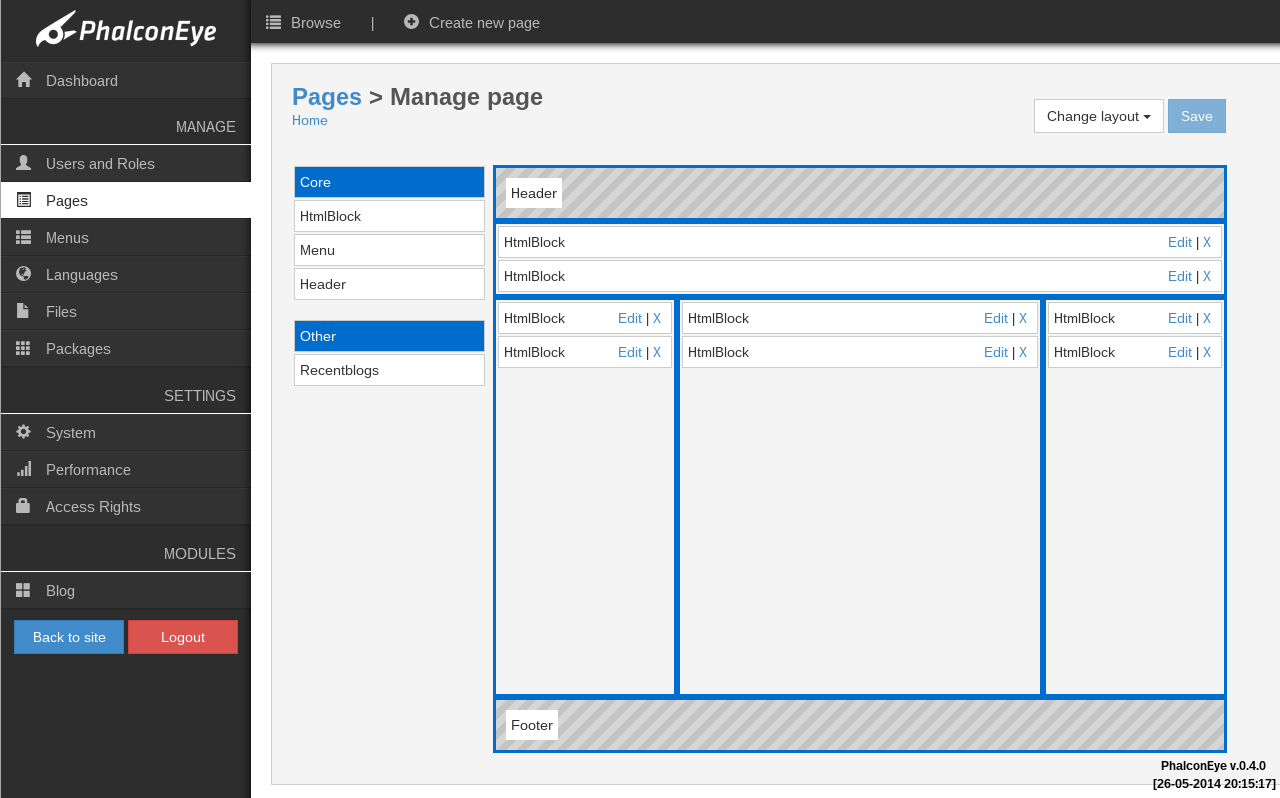
List of available widgets is located on the left of management page. Widgets can be part of modules and be displayed under appropriate module name (eg. Menu and Header widgets belong to Core module). They can also be installed as standalone packages and will be displayed under “Other” (see Recentblogs widget above). Right next to list of available widget you can see the layout you have chosen for your page - this is the drop area for widgets. Adding new widget - Simply drag a widget from the left area and drop it onto any part of the layout. It is also possible to re-arrange widgets which have already been dropped by dragging and dropping them elsewhere. Remove widget - Simply click ‘X’ link from within the widget. Edit widget - Almost all widgets have their options. To edit them, click ‘Edit’ link within the widget and you will see a form with options: 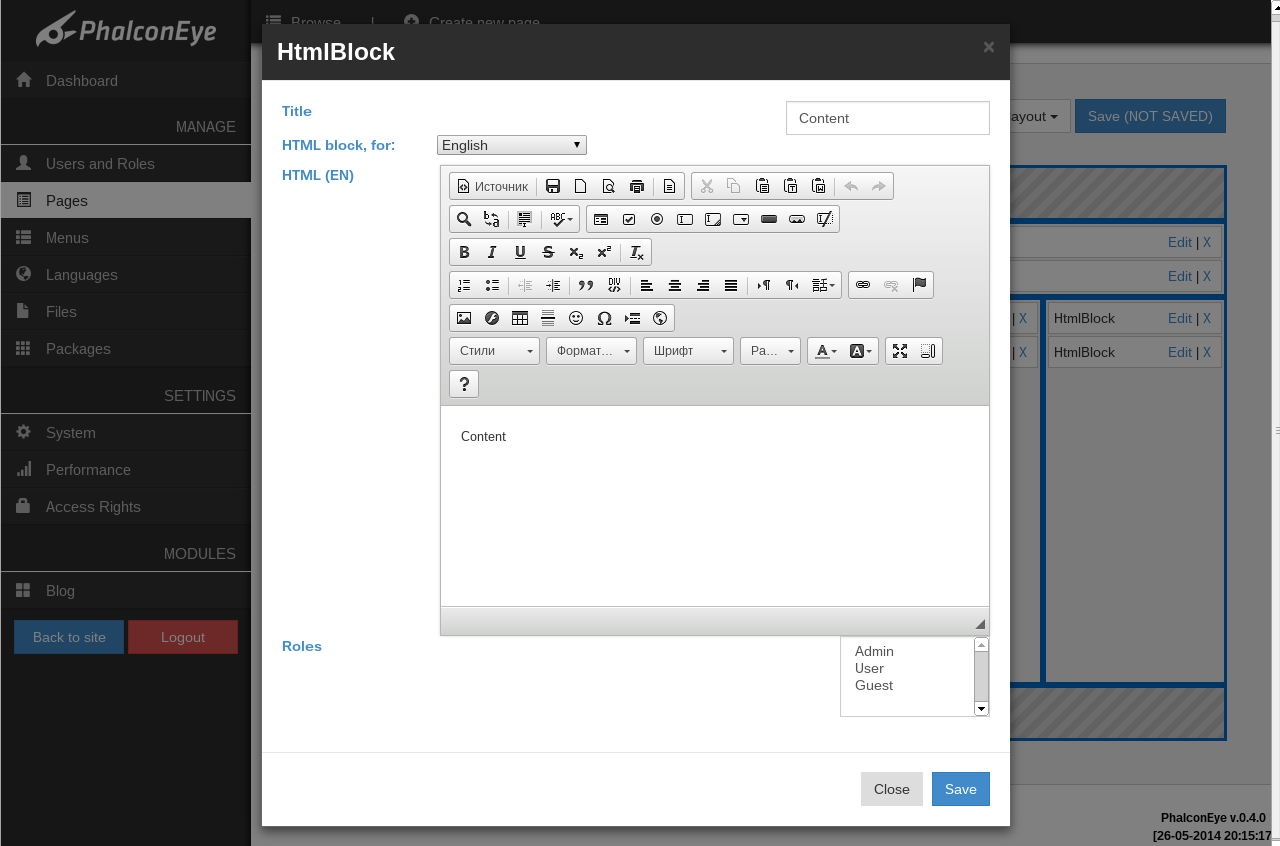
Once you have done editing widget’s parameters, “Save” button becomes active. Note that you can configure multiple widgets at the same time, but all the changes will take effect only if you save the layout: 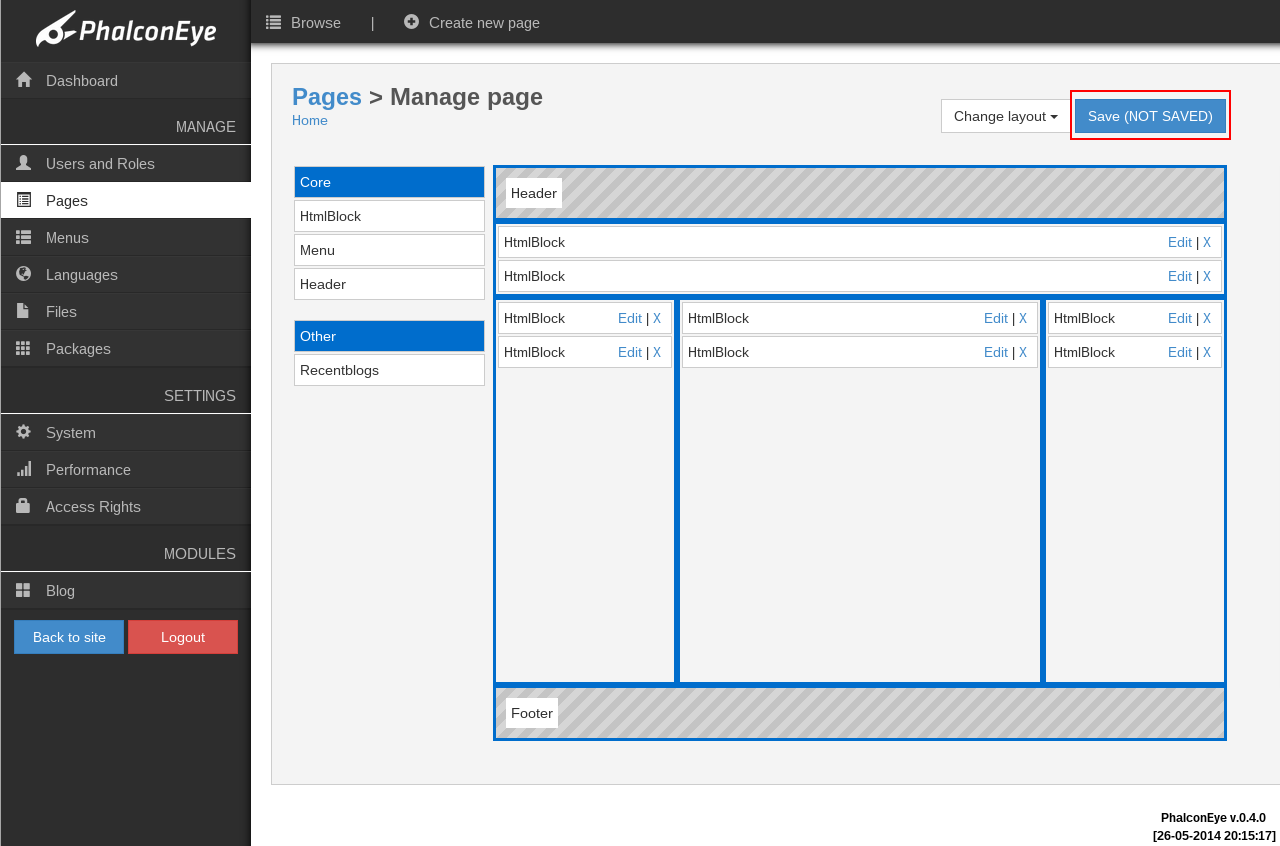
Page layout can be changed at any time: 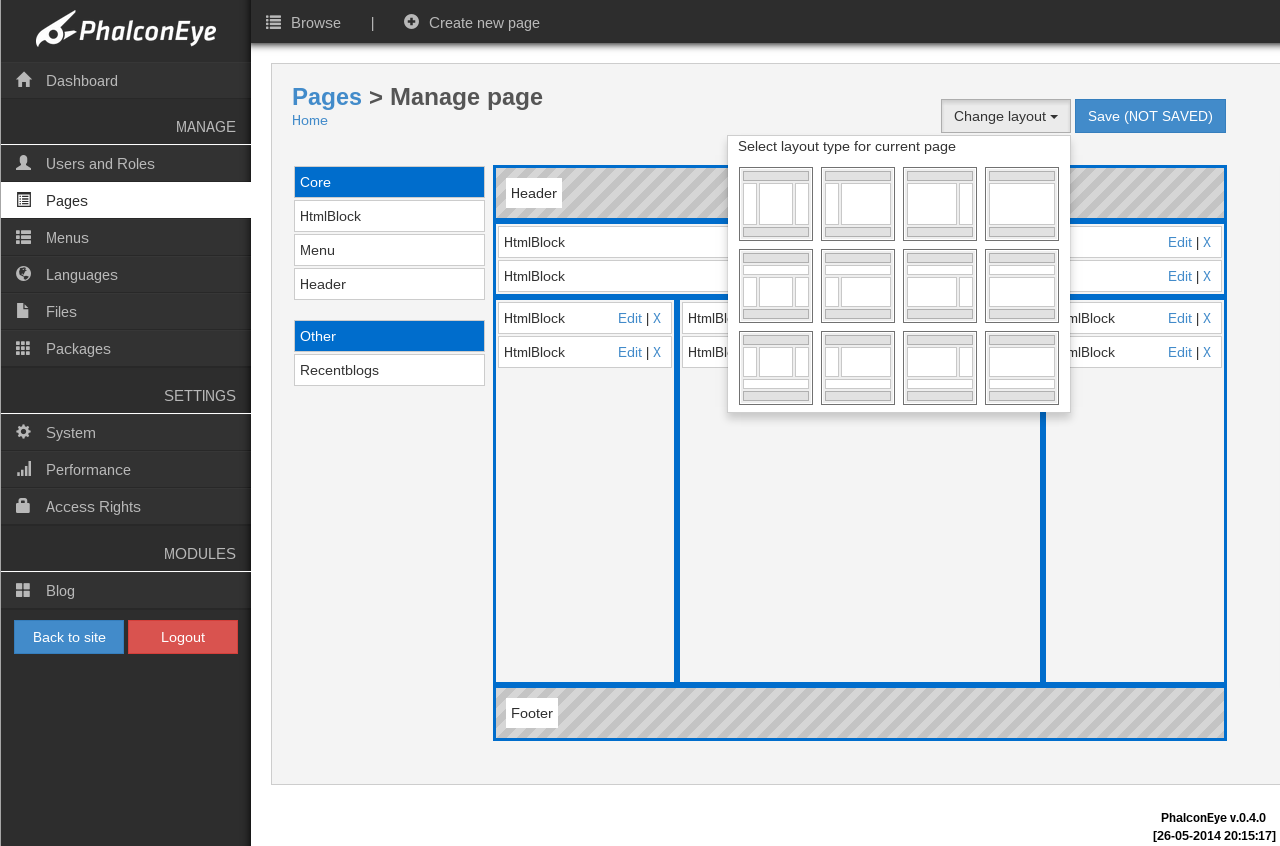
Be careful, though, when doing so! When a newly chosen layout has less columns than current, some of them might be lost permanently with all its widgets and their saved parameters. To avoid that you can temporarily move elsewhere widgets from the column which is about to be removed. @TODO: Describe precedence of which columns are removed. |